Projects & tasks
Projects, members and roles in Project Board
A project bundles the tasks, sections, labels and milestones of one undertaking. This page shows you how to create projects, keep track of all of them and control who can see and edit what.
Create a project
- Open Projects in the sidebar and click New project.
- Pick a Template if you like. The title is then prefilled with the template name, and you can overwrite it.
- Enter a Title and click Create.
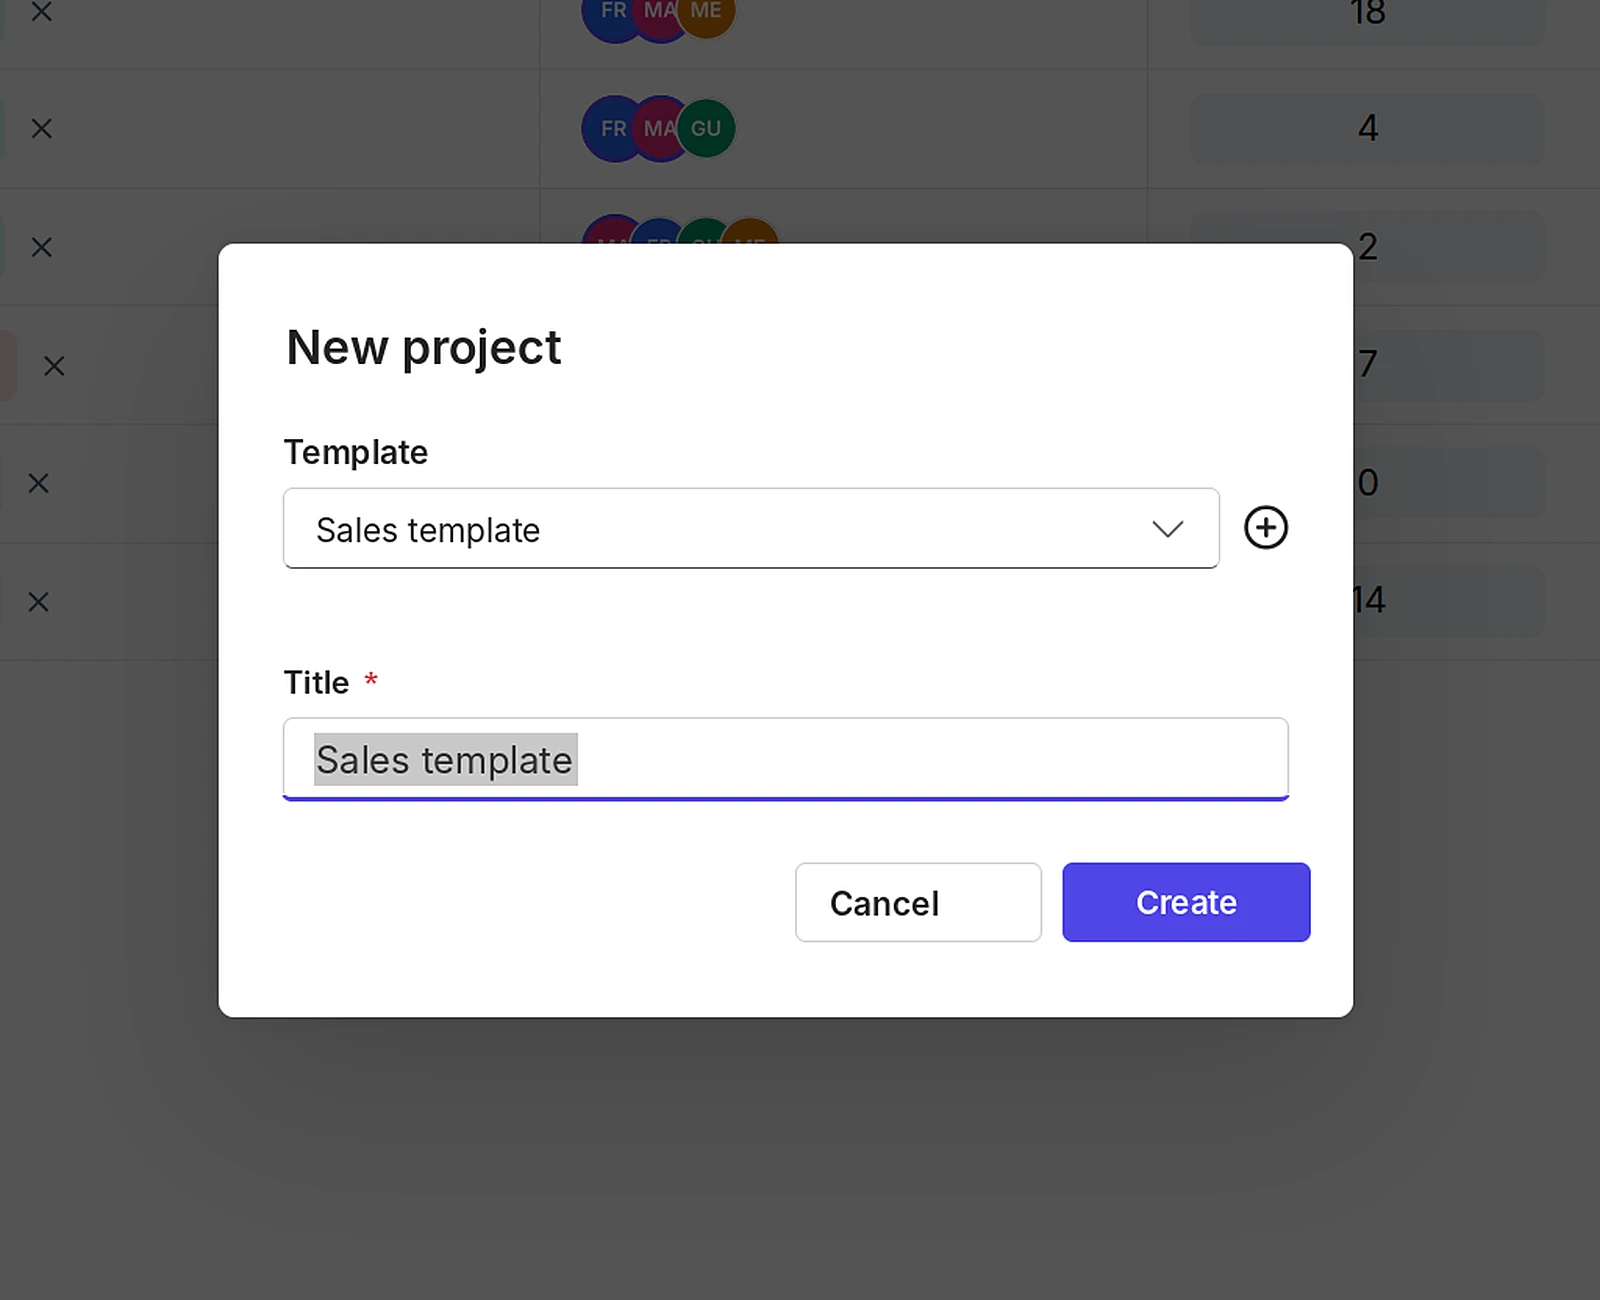
Administrators and managers see a plus icon next to the Template field. It takes you straight to template management. Templates that your current plan no longer covers are locked in the list and marked with an upgrade hint.
For the very first project in an empty workspace, a second step follows: you decide whether to organize tasks with status columns (Not started, In progress, Done) or with custom sections.
Administrators decide in the workspace settings whether all workspace members may create projects.
The project list
Projects shows all projects you have access to. For each project the list shows the Project status, the Project members, and the number of Tasks, Overdue tasks and Completed tasks.
- Use the star to mark a project as a favorite.
- Use the bell to follow a project and get notified about changes.
- Find projects by title with the search field, and narrow the list with Filter. The columns can be sorted.
- The menu at the end of a row holds further actions, for example archiving.
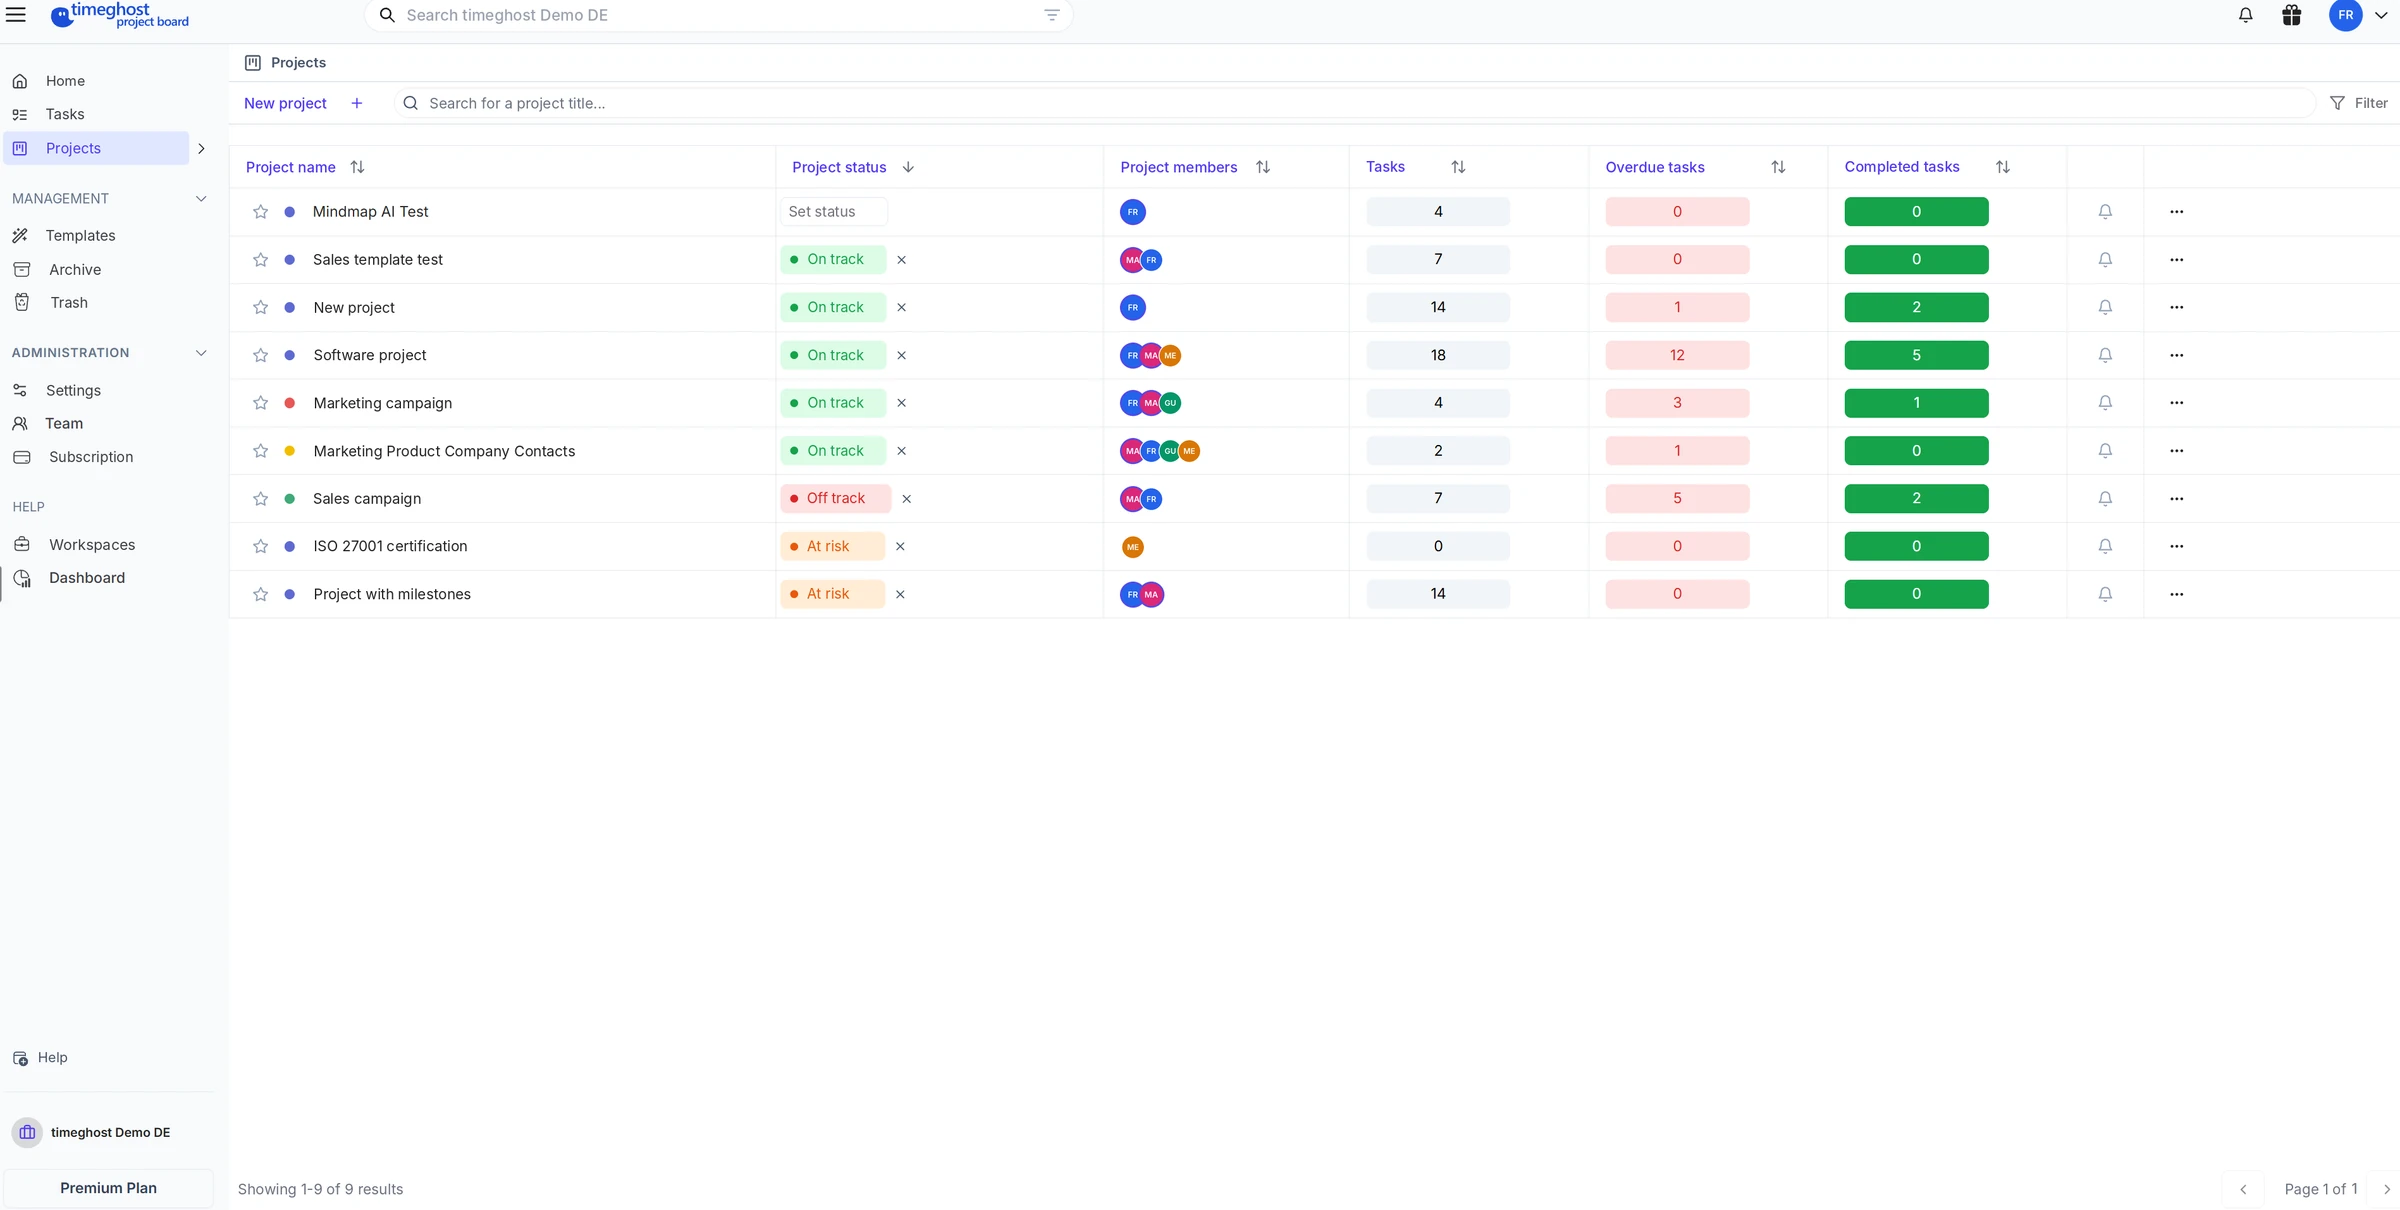
Project status
The project status shows at a glance how a project is going:
- On track
- At risk
- Off track
- On hold
- Completed
You set the status in the project list via Set status, or next to the title in the open project. The X next to it removes it again. Whether you can change the status depends on your role in the project.
Members and roles
In the open project, click the members' profile pictures in the top right. Project members - Access and role management opens.
- Add people via Search by name or email. You invite people who are not in the workspace yet by email. They appear under Pending invitations until they accept.
- Choose each person's role in the dropdown. The X removes a person from the project.
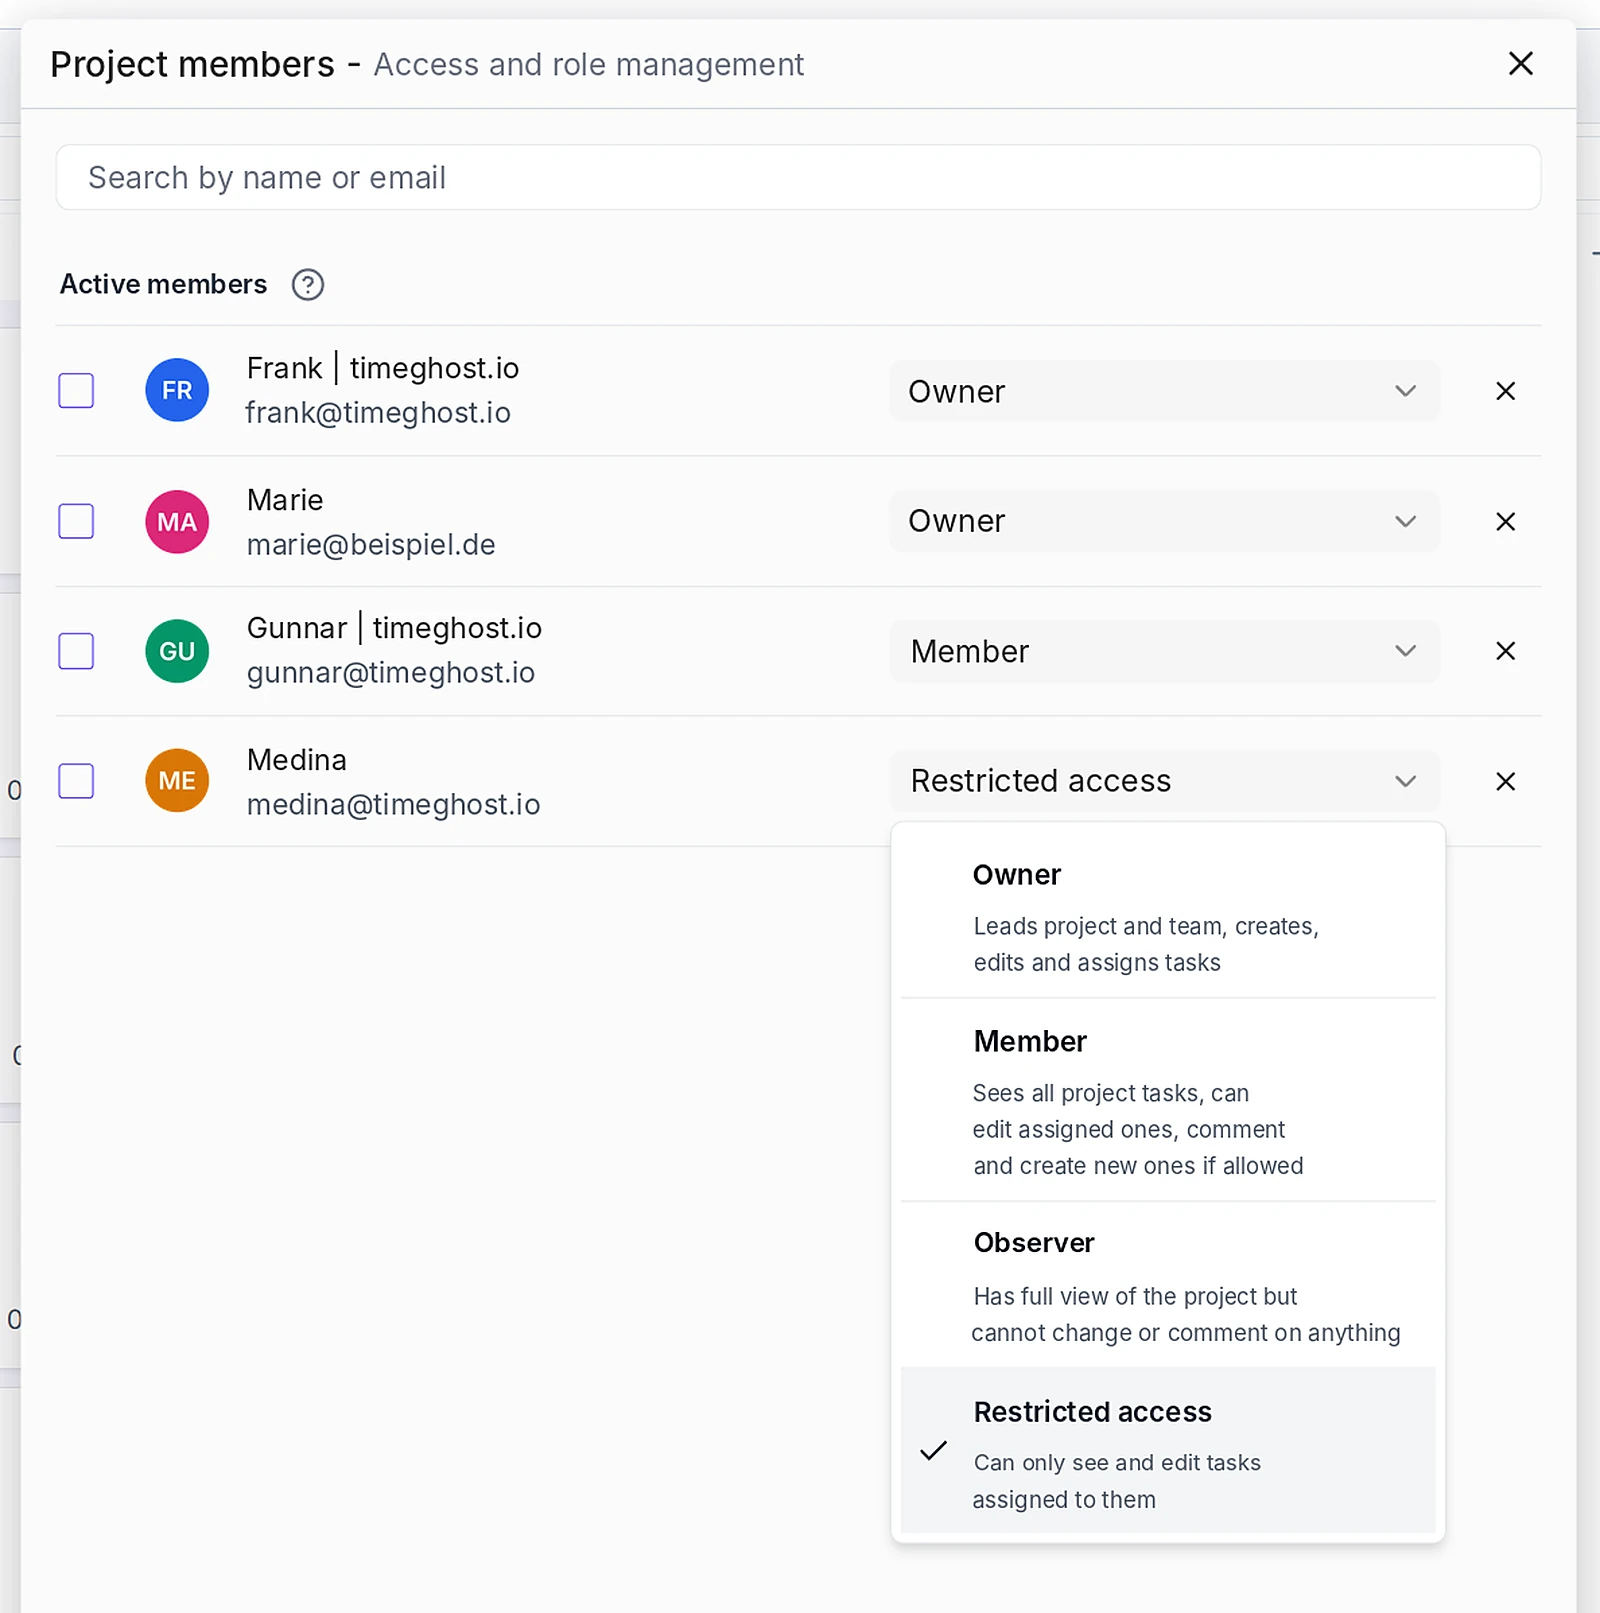
These are the roles in a project:
| Role | What the person can do |
|---|---|
| Owner | Leads project and team, creates, edits and assigns tasks |
| Member | Sees all project tasks, can edit assigned ones, comment and create new ones if allowed |
| Observer | Has full view of the project but cannot change or comment on anything |
| Restricted access | Can only see and edit tasks assigned to them |
Project settings
You control per project what the Member role can do. Open the Settings menu in the top right and choose Project settings. There you turn four permissions on or off:
- Project members can create new (sub)tasks
- Project members can edit tasks that are not assigned to them
- Project members can open tasks that are not assigned to them
- Project members can reassign their tasks to others
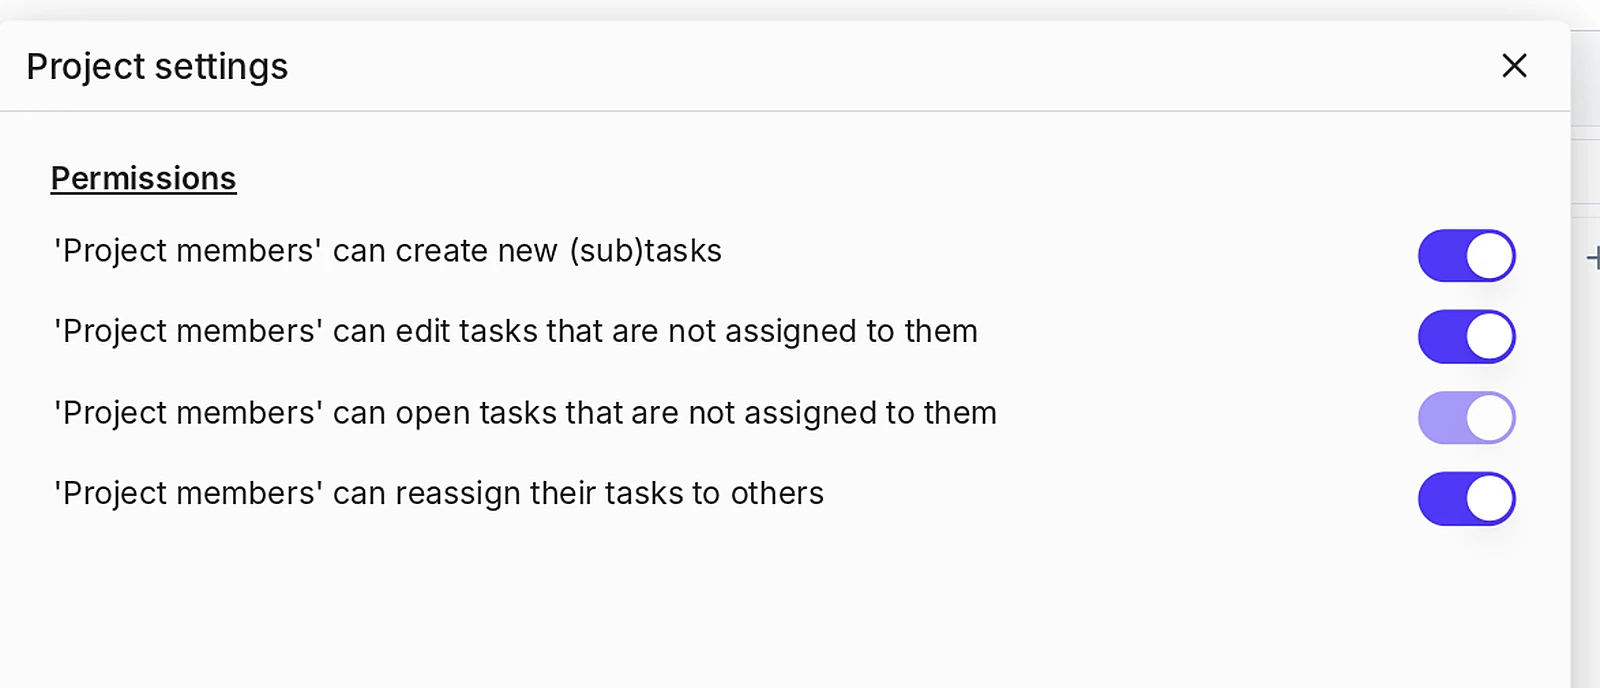
Administrators set the defaults for new projects in the workspace settings.
The project menu
The Settings icon in the top right of the project gives you access to all project functions:
- Rename the project
- Save as template, see Templates and recurring tasks
- Manage labels: create and edit the project's labels
- Milestones
- Recurring tasks: appears once the project has a series
- Project logs: all changes in the project, on paid plans
- Project settings
- Import, Archive and Trash, see Import, archive and trash
Change the project color via the colored dot in front of the project title.
Milestones
Milestones mark important goals and dates in a project. Open Settings and then Milestones.
- New milestone creates a milestone with a title, due date and description.
- Filter the list with All, Open, Overdue and Done. Overdue milestones are highlighted in red.
- Each milestone shows its status and the linked tasks, for example 2 of 5 tasks done.
- Hover over a milestone to mark it as done, edit it or delete it.
You link a task to a milestone in the task details via the Milestone field.
Next steps
- Tasks, subtasks and comments: create and edit tasks
- List, board and calendar: the views in a project
- Security and operations: workspace roles and settings for administrators